Sword and Tower Games
©2022 Sword and Tower Games | Template by Bootstrapious.com & ported to Hugo by Kishan B
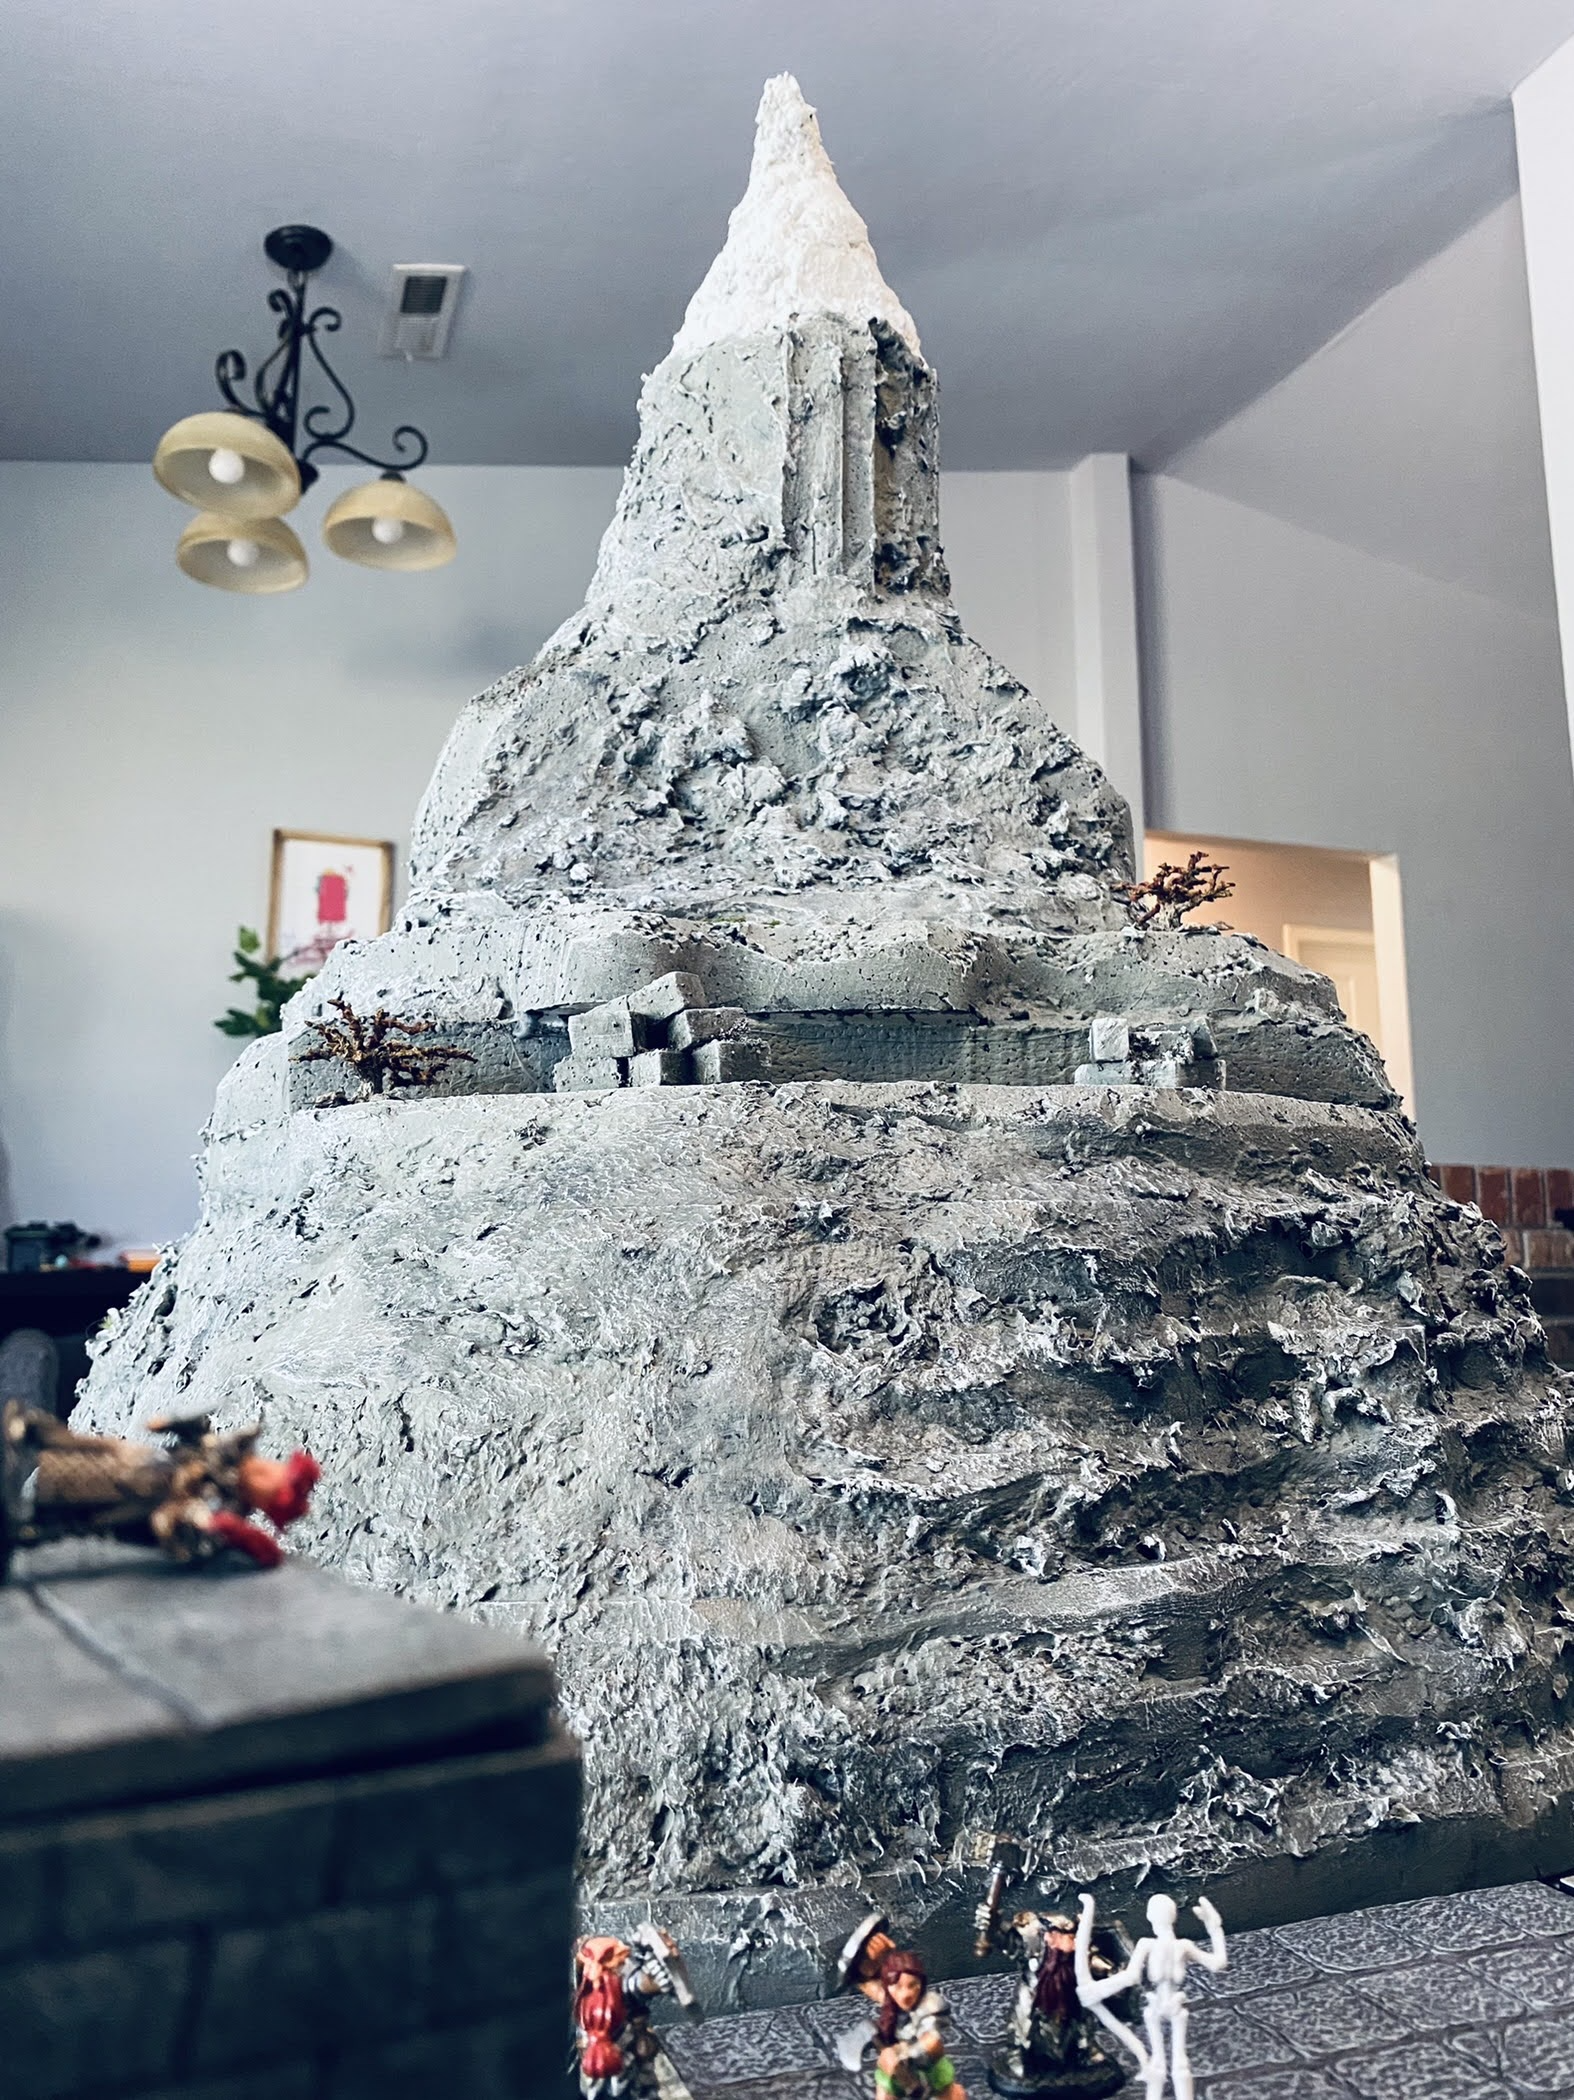
How to Build a Mountain
In my weekly lunch game, my players had found themselves in the middle of a huge battle between Fire Giants and Dwarves. They were battling in the shadow of a massive underground mountain called Frostpeak. Here, the Dwarves had built a stronghold city inside and around the mountain. The battle had lasted several sessions of play, and I wanted to make the last session an epic one. So, I decided to build the mountain and make a cool battle scene. Here’s how I did it!
Cutting the Pieces
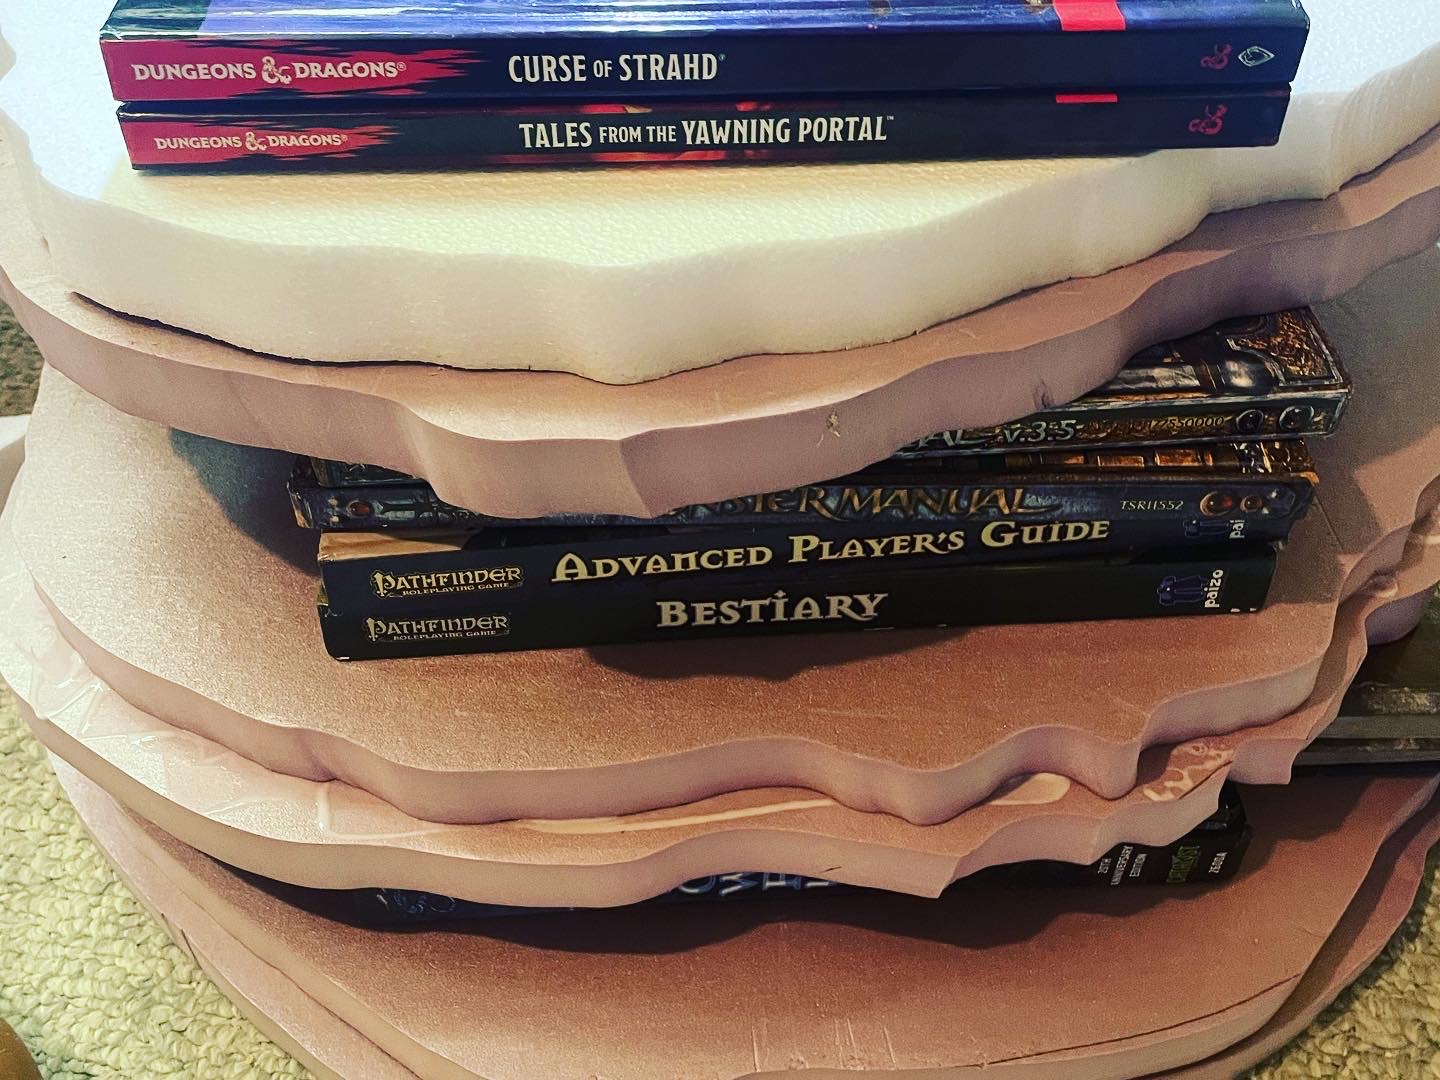
I had a lot of extra styrofoam laying around and some really nice insulation foam. Since I didn’t have a huge block to cut out from, I decided to create the shape of the mountain in layers. Later, I have a solution for covering up most of the layer lines.
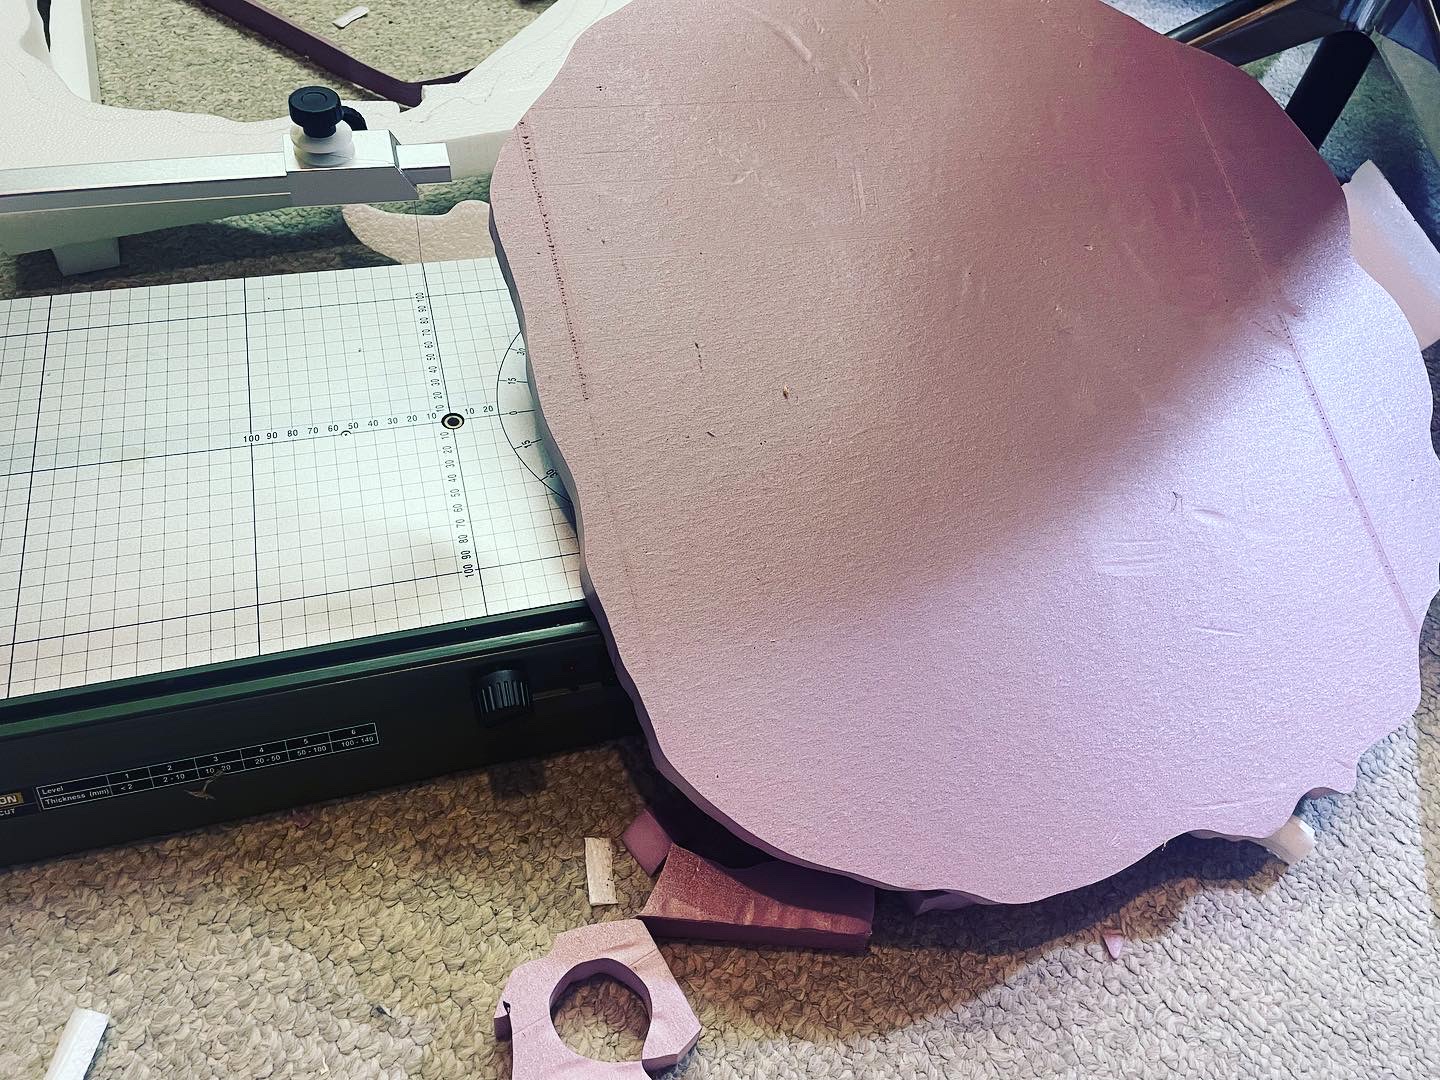
I used a Proxon cutter to slice the large styrofoam squares into curved pieces.
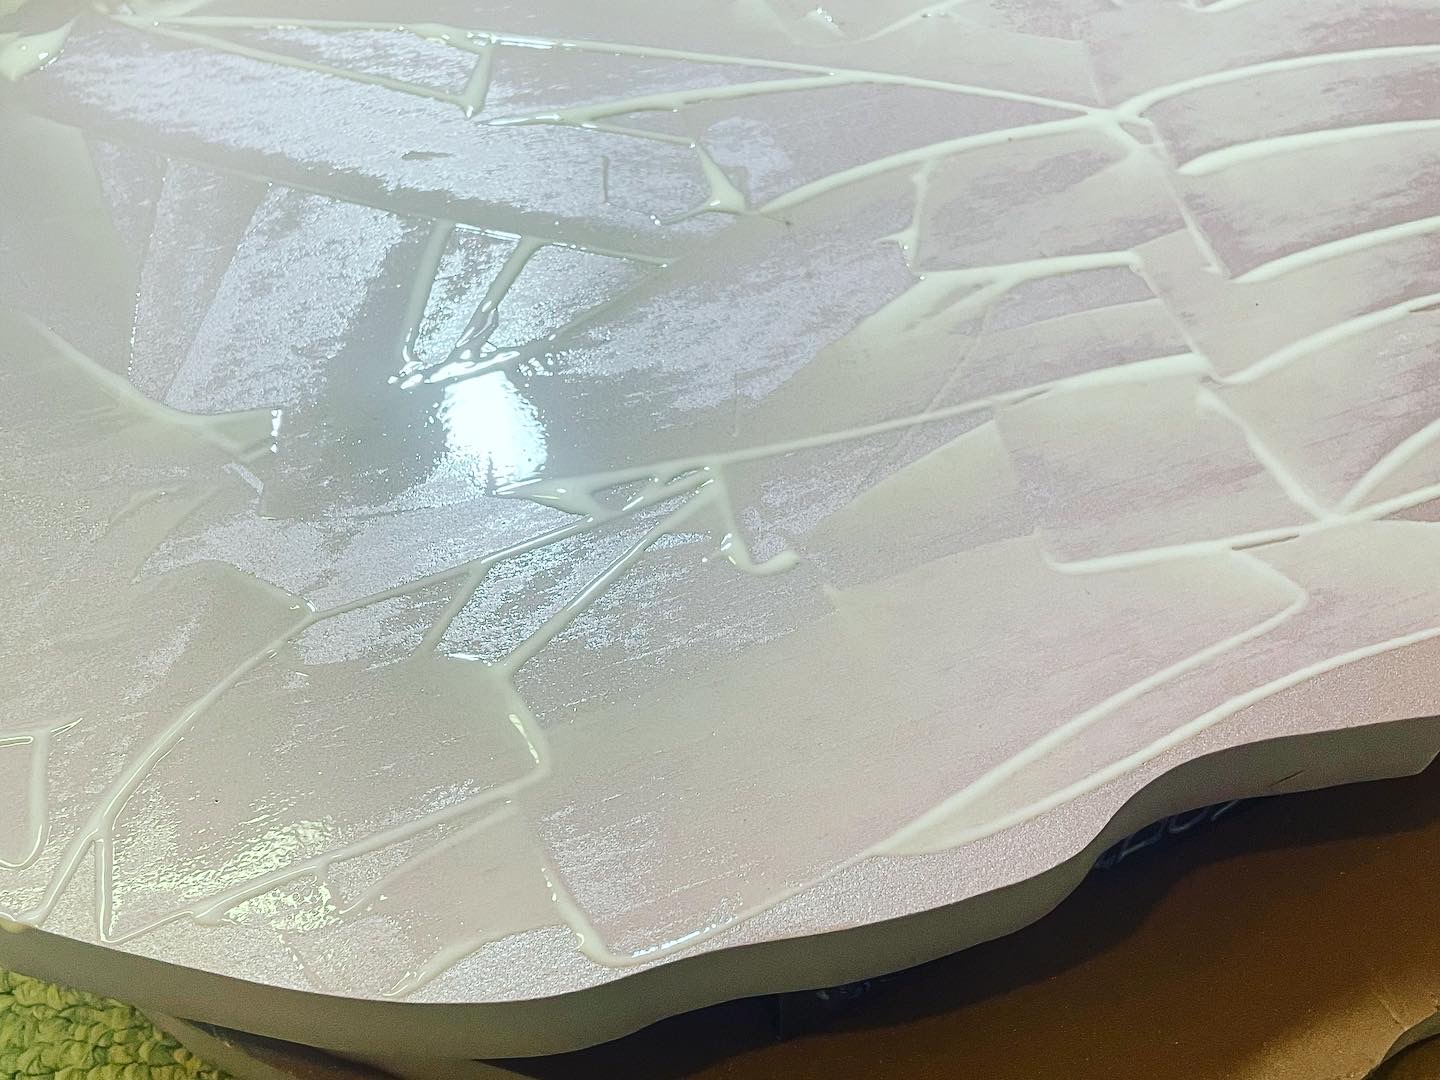
Then, I glued them together, two pieces at a time. Each set received multiple hours with a bunch of RPG books sitting on top to provide pressure. I combined the sets together and repeated the process. I added wooden skewers to add extra horizontal support, and even some toothpicks for a few of the important connections.
Making a Mountain out of Layers
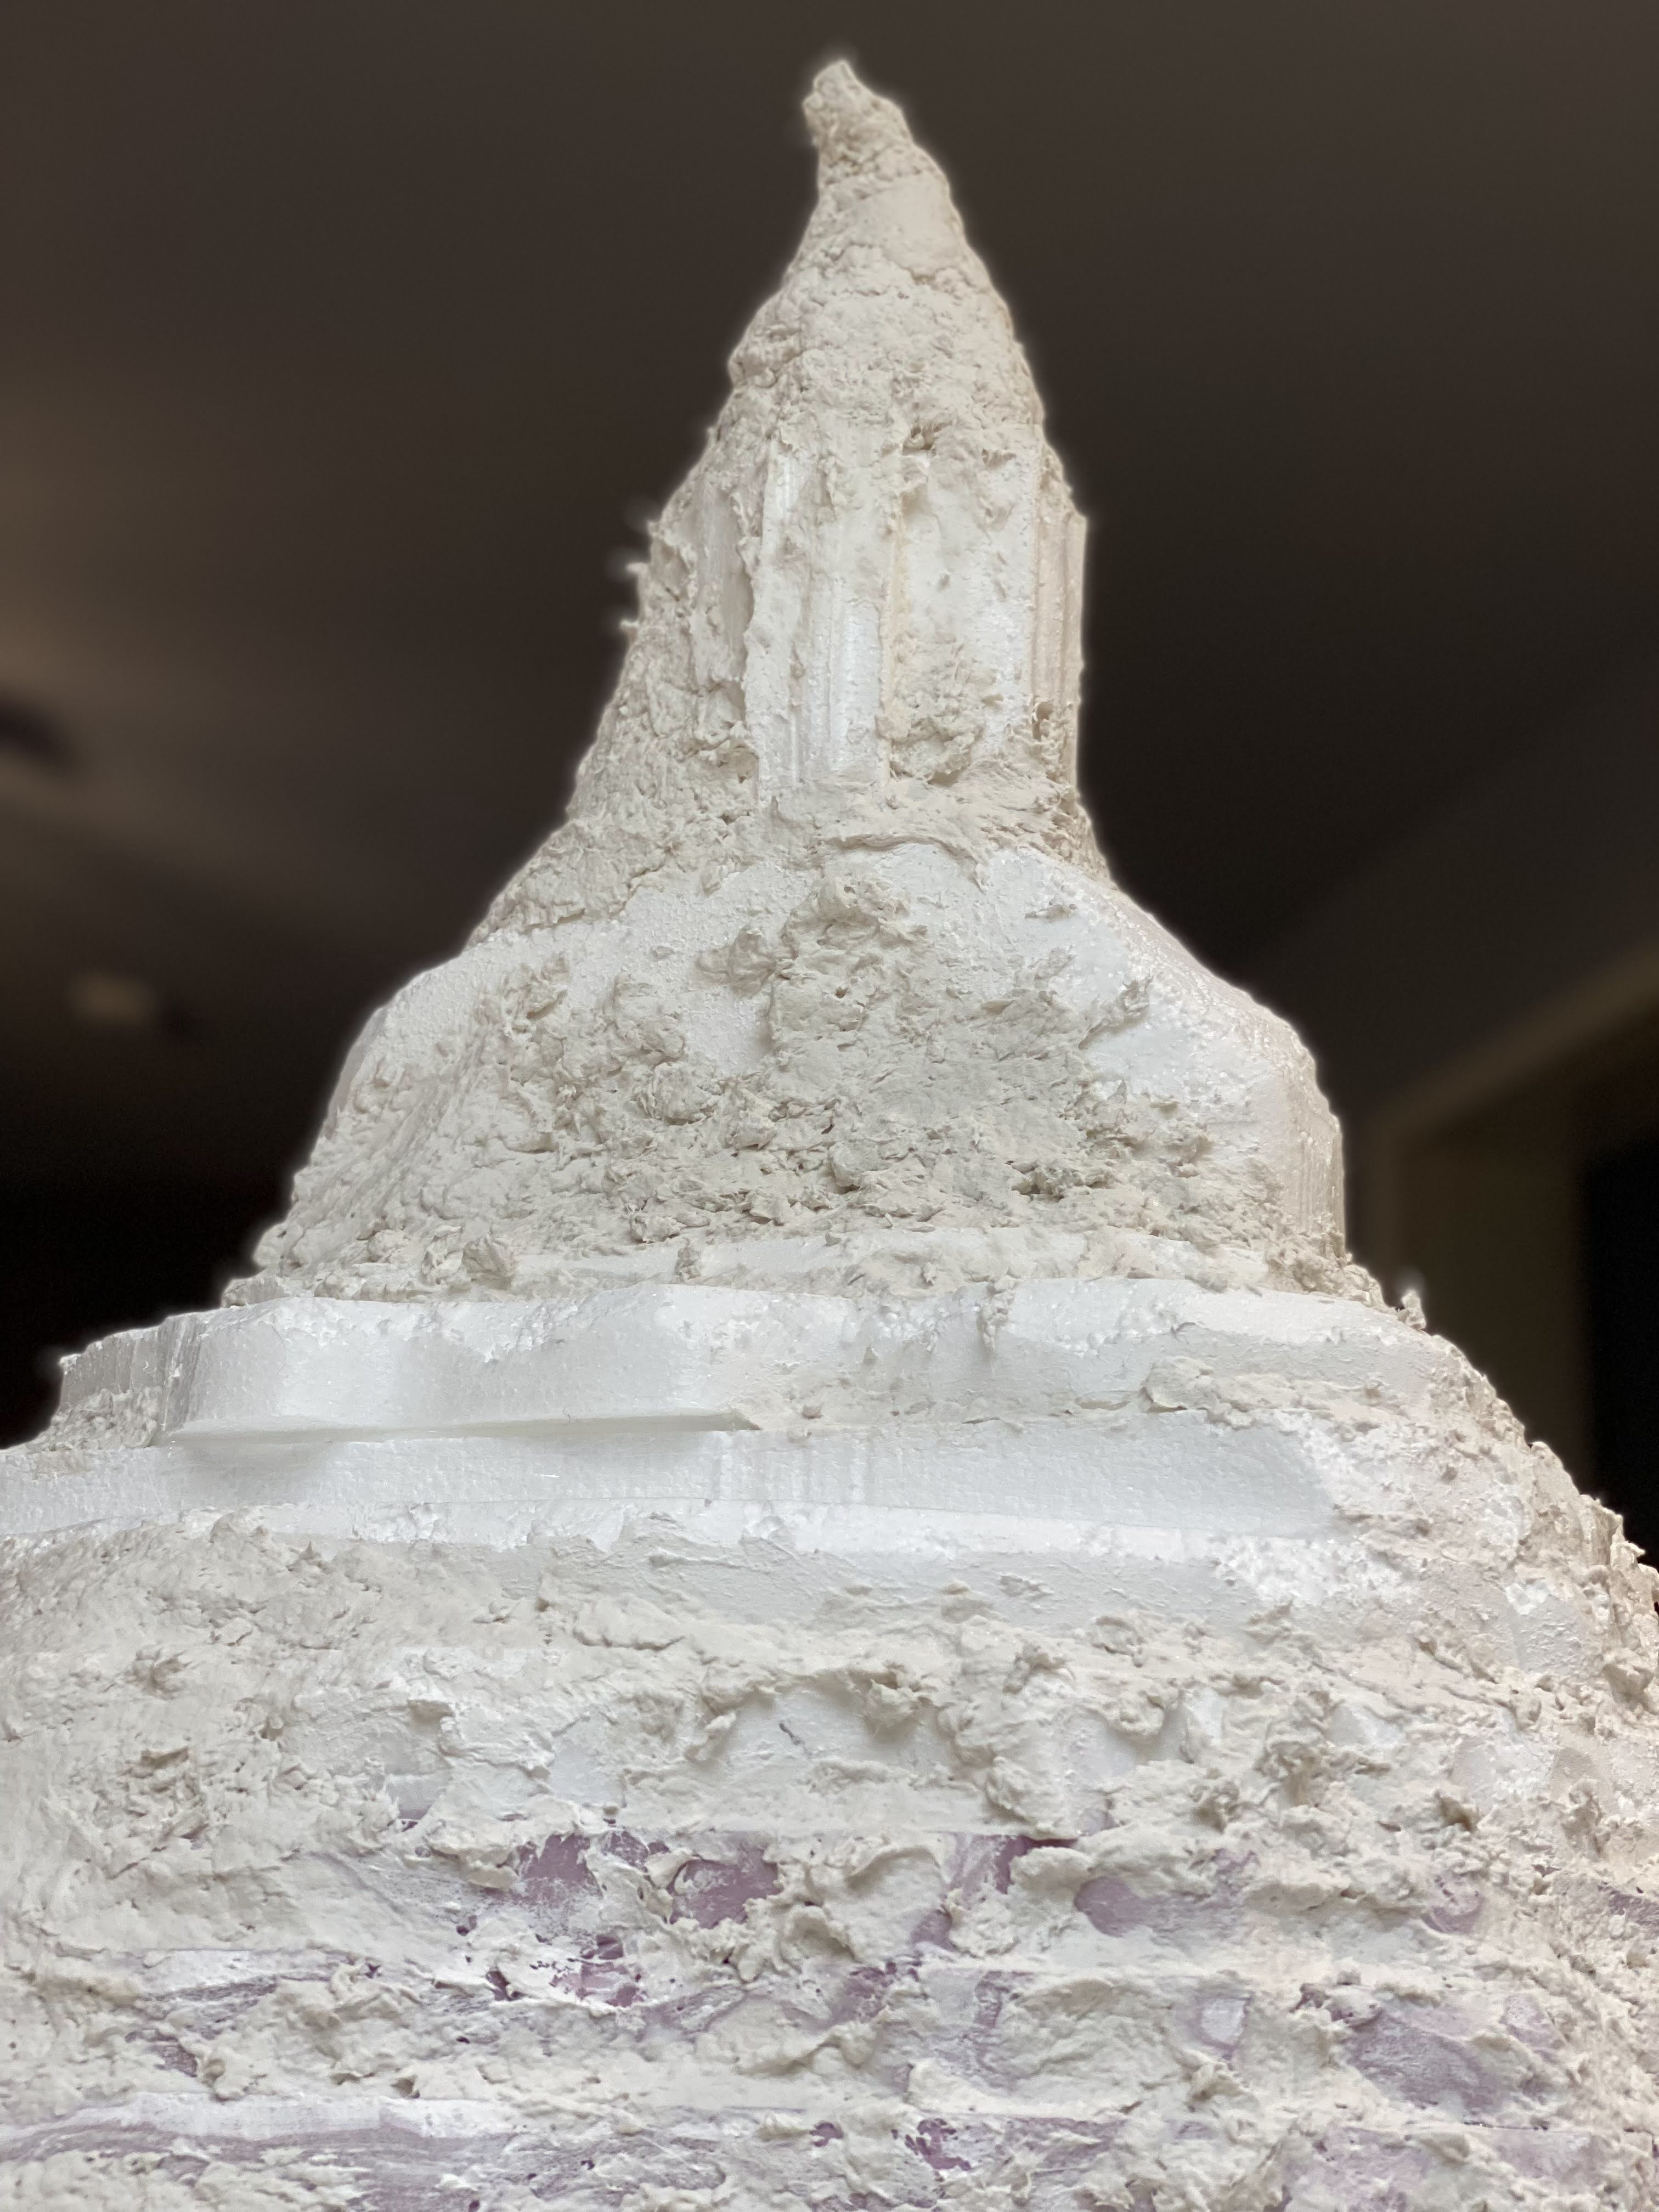
Now that it was glued together, I began the process of making the layers look more like a mountain. First, I used a rolled-up piece of aluminum foil to give the foam stone-like texture. I always keep a bag of sculptamold, a modeling compound, around for making rocks and other sculptable pieces of terrain.
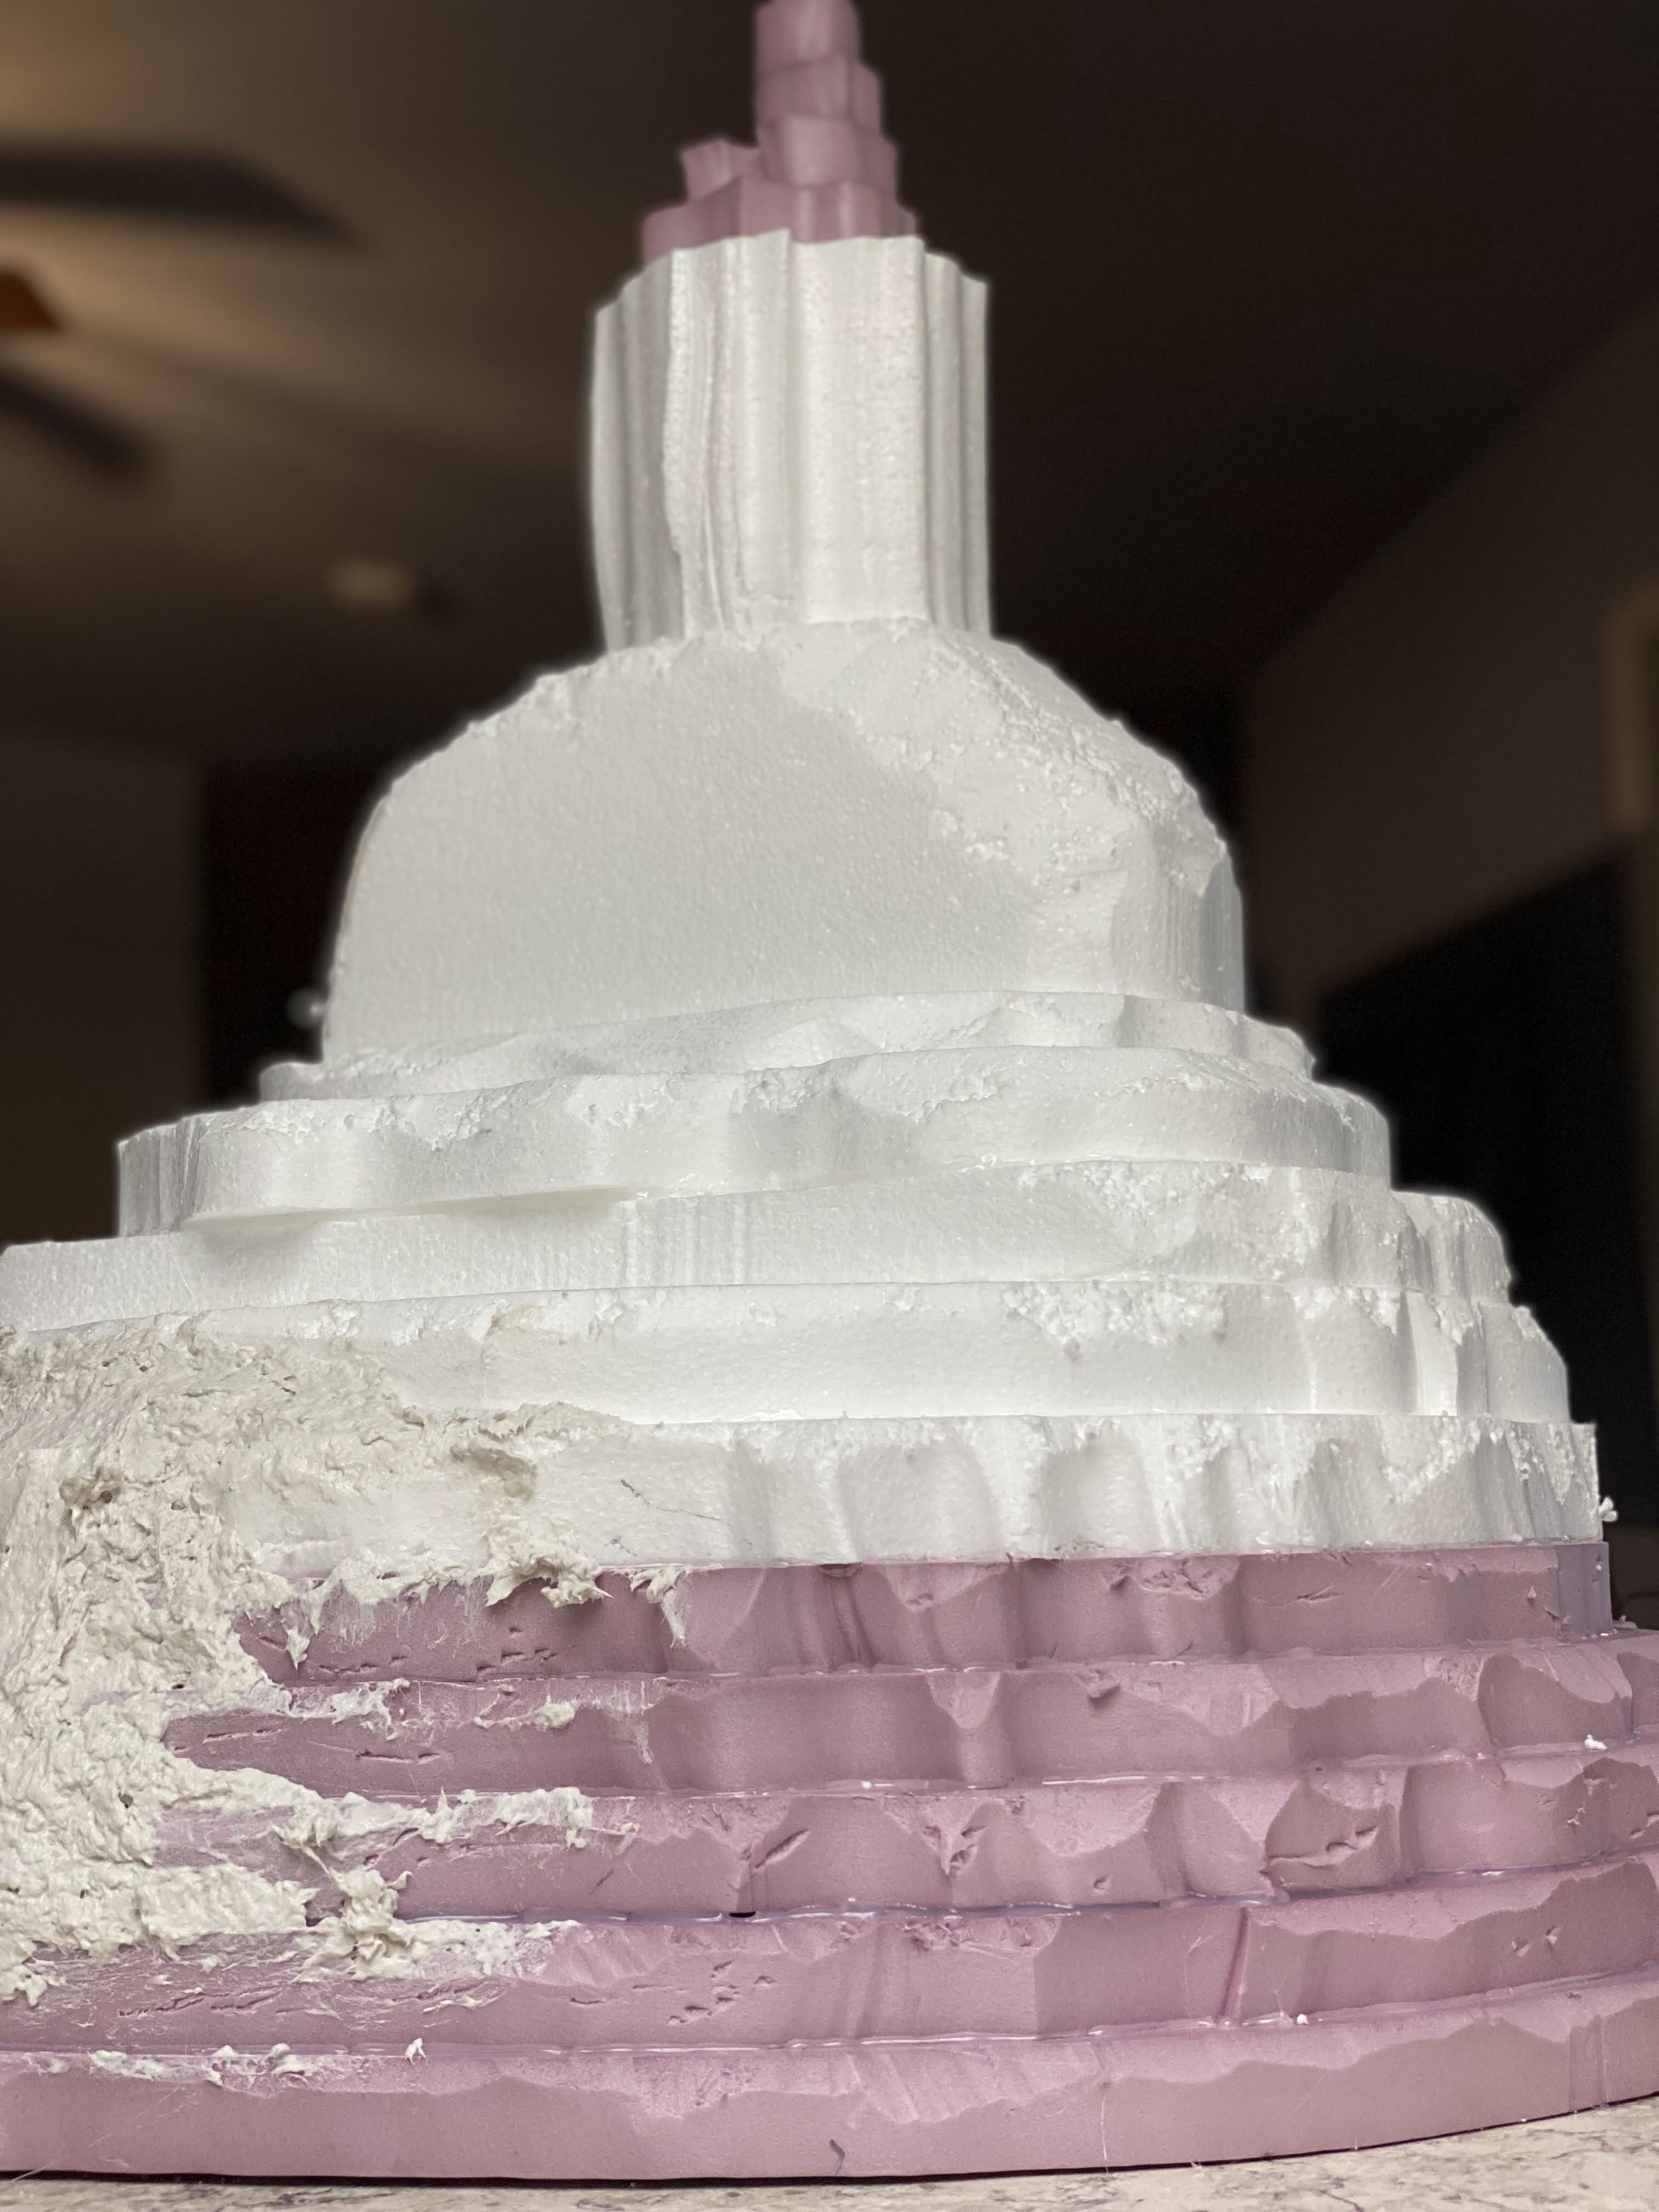
I used nearly an entire bag of sculptamold to create the rock-like structure and bridge the layers into one uniform piece. I wanted to leave some of the layers visible to appear like rock out-croppings, etc.
Painting the Mountain
Once the sculptamold was dry, I used a coat of Modge Podge mixed with black acrylic paint around the entire structure. This is like a rubber coating that will protect the foam and sculptamold and doubles as a nice base coat of paint. From there, I painted the entire mountain with gray paint. If you try to make terrain this large, make sure you are using a cheaper acrylic paint. Otherwise, you’ll go through your good paints so quickly.
With the two base layers of paint finished, I gave the mountain a good wash in my homemade terrain wash. This is black ink, water, acrylic base, and some jet dry or dish soap. I highly recommend checking out Black Magic Craft’s recipe for terrain wash! Last for the paint was a heavy dry brush with white/gray. This brings back a lot of details, and you can emphasize the worn and eroded qualities of the mountain. Finally, the top of the mountain received several coats of flat white to represent the permanent snow at the peak.
Now, I wanted a gray-colored stone as the base for my mountain. I find it goes well with so many kinds of terrain. However, you could use a variety of colors to represent different parts of the world. For example, a mountain in Utah might be made of sandstone and you could instead use a brown base coat and a yellow-ish dry brushing. Experiment!
The Final Details
I had some poorly cut areas of styrofoam that I did with a box knife. Generally, you want to avoid that with styrofoam because it tears rather than cuts. That leaves you with round balls of styrofoam visible, and definitely not a natural-looking surface. To partially fix this, I glued a good amount of sand onto those patches. Once painted with the same methods above, they blended in quite well.
I also added some grass, bushes, and a few other pops of color here and there. I think I would add more of these in the future, but it was hard to judge without having other terrain around it. Because I wanted this mountain to blend in with any type of terrain, I only added a few splotches of these and left a few flat surfaces to put tries and structures on as needed.
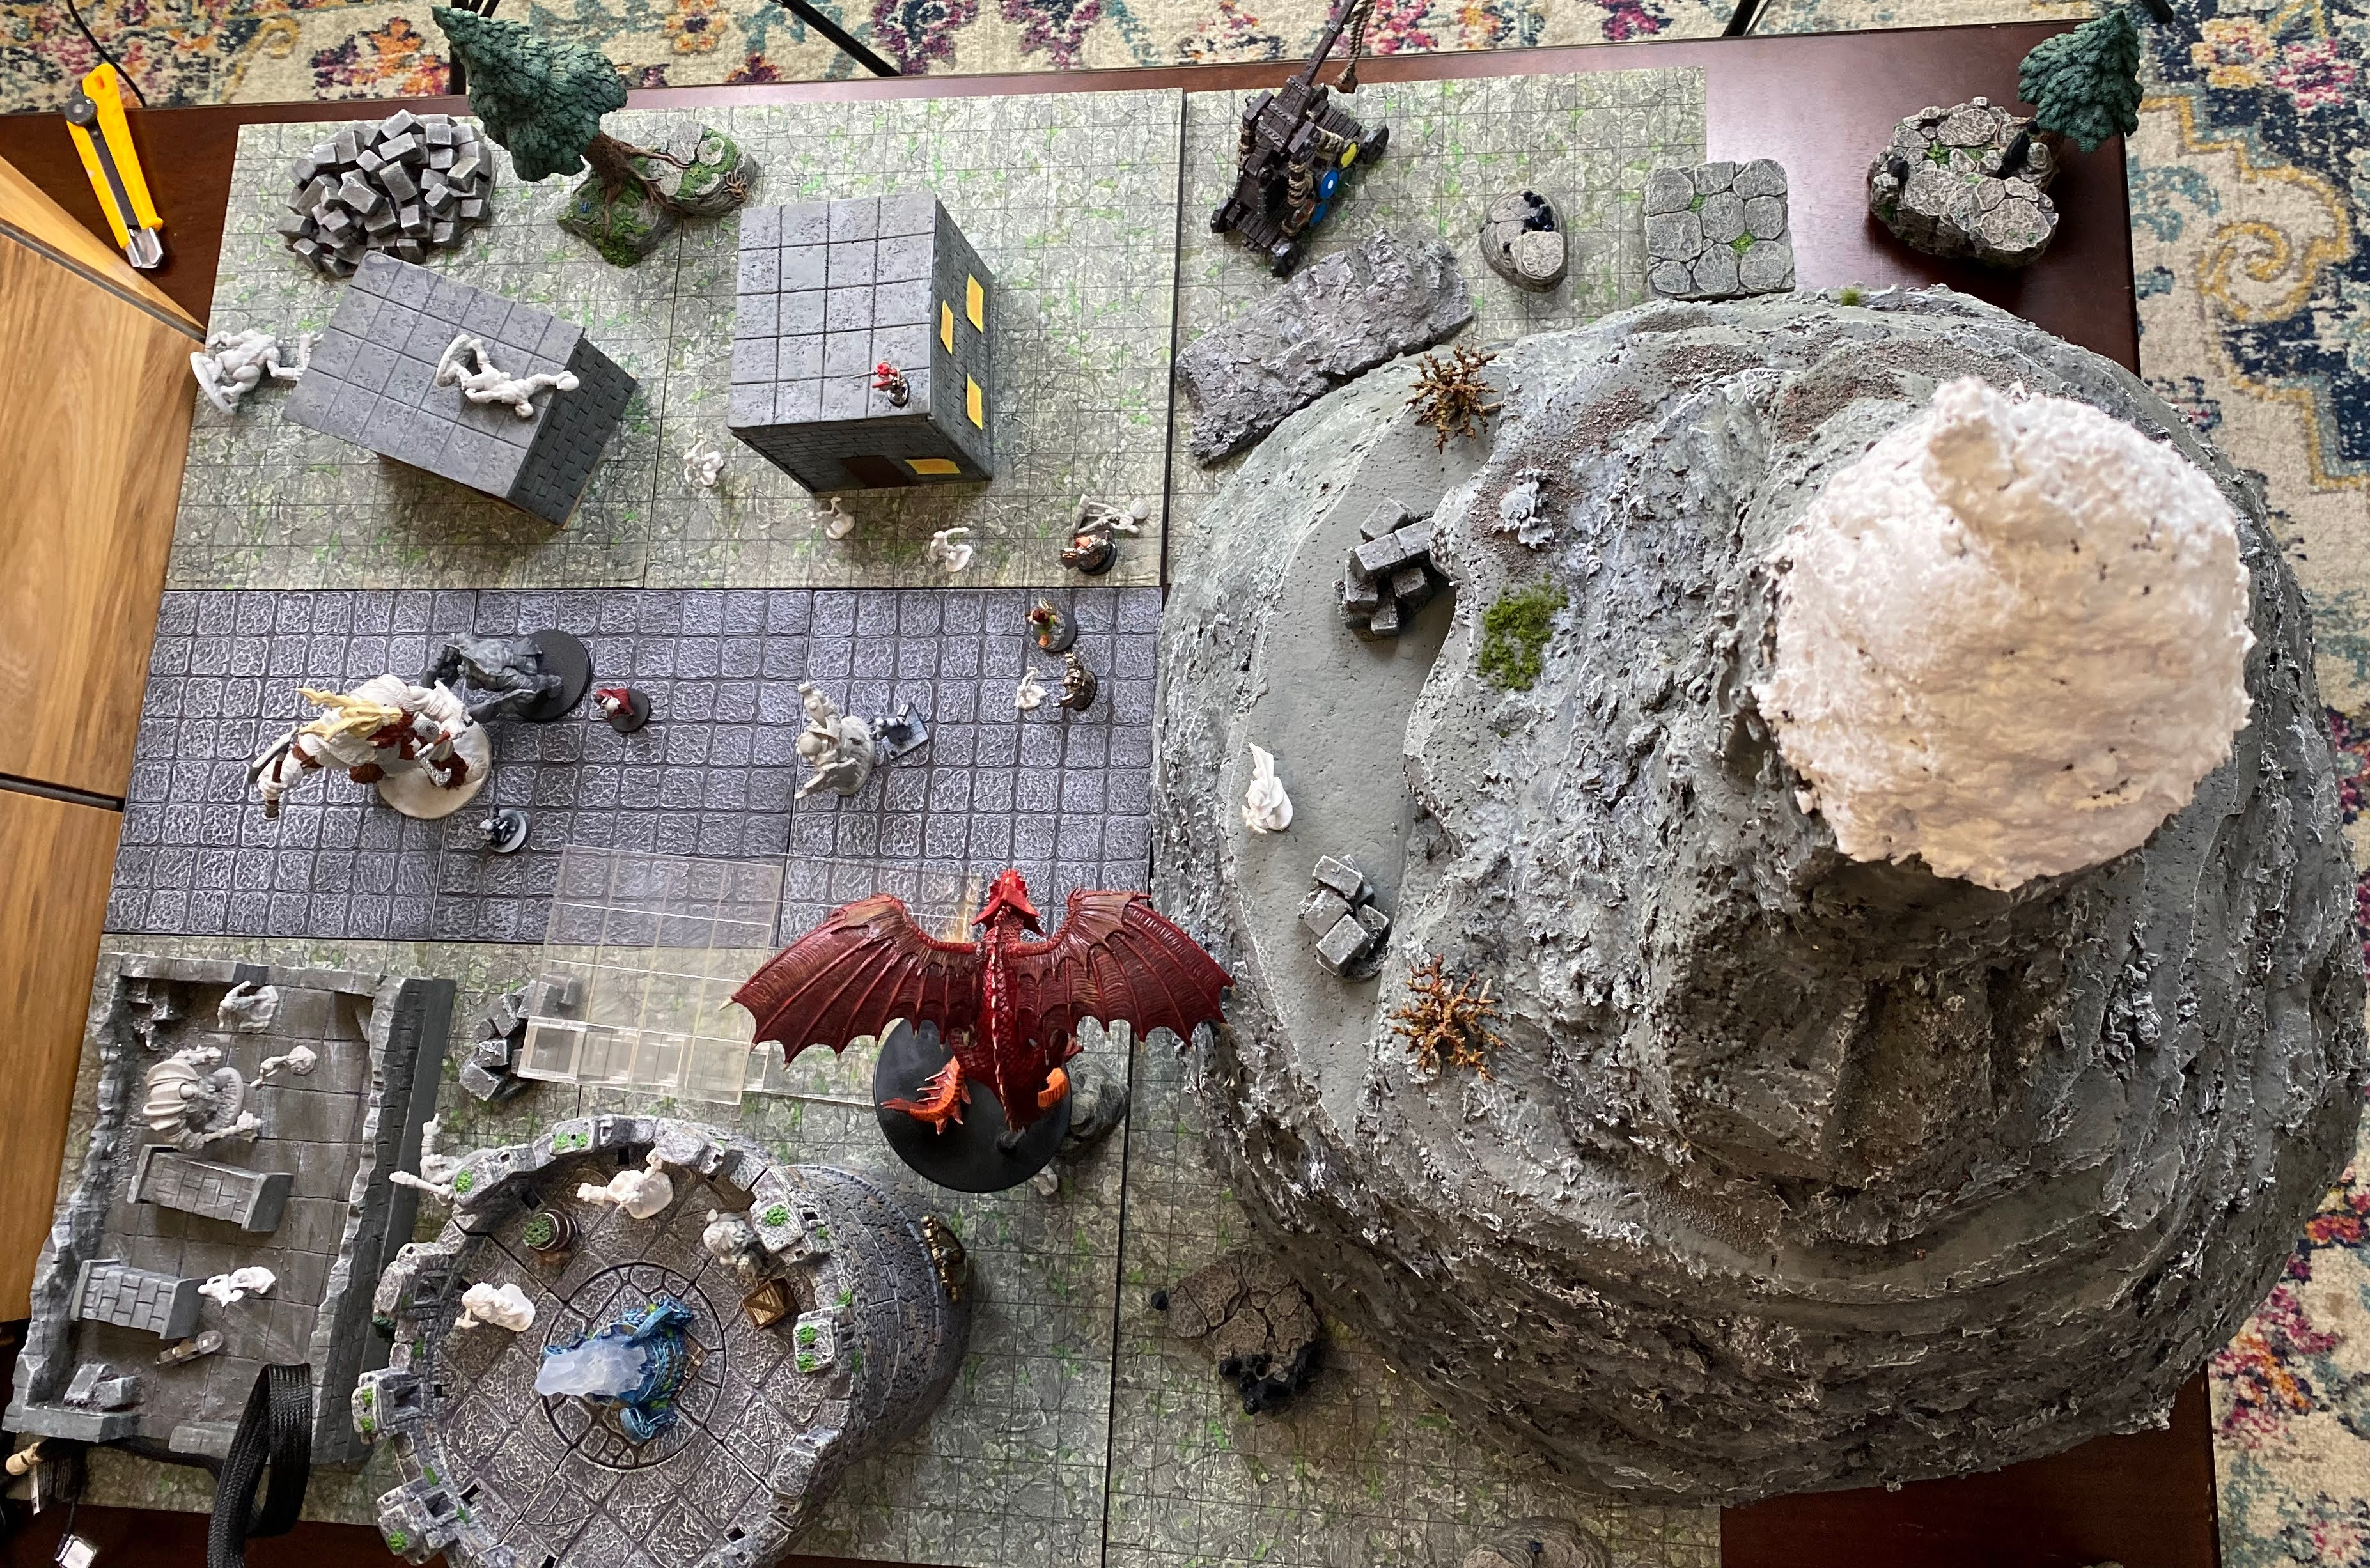
That’s it! The mountain is done. This was a big project for just one piece of terrain. It serves as a backdrop to your other pieces, but I think with some tweaks you could make it very usable for wargaming or tabletop RPGs. Thanks for reading, and get crafting!